The past Saturday was my wife's birthday. Being an artist gives me the privilege to express my feelings for her with painting. I still remember painting her for the first time with oil back in 2004 when we were still dating. I never get tire of painting her. It gets easier since I am very familiar with the structure and the features that make her face. However, I do find myself venturing out to new territories recently when it comes to painting a very familiar subject such as my wife. The confidence I have when painting her helps me to be a bit more bold and give her more character and paint her with less information. Let's dive in!
Source image
This photo was taken a few years back. It's a very typical everyday photo. But I saw a lot of potential in this photo. I really like the soft lighting. I also like how she turned her head and showing a nice neckline. I took the photo with my camera a bit tilted. So I will need to correct that in my painting. As always, I don't want to just copy the photo without process it. You will see I change things here and there. The end result might not look exactly like the photo, but I do think I successfully captured her essence.
Drawing
Just because I'm familiar with how she looks, doesn't mean I neglect drawing altogether. A good drawing is still necessary for a successful painting. This is especially true when you are painting a portrait. You might get away with a taller tree or a wider mountain in a landscape painting. But if the proportion and the structure are incorrect in a portrait, people will immediately spot it and call it out. I started my pencil drawing with very light and loose lines to block out her facial structure. And then I started to draw some cleaner, darker marks to create some clear indications of the things that define her face. I call these "the anchor points"
First Wash - basic skin tone
The main purpose of the first wash is to establish some basic skin tones and knock out that intimidating white of the paper. I premix the basic skin tone with Cadmium Red and a bit of Cadmium Orange on the palette. Then I use a decent size squirrel mop brush and go for it. I made sure the mixture was fairly wet so the paint could flow easily on the paper. Also keep in mind that the wetter the mixture, the lighter it dries. So don't be afraid to go a bit bolder on color. I started the first wash from the nose, and workout the rest of the face rather quickly. I wanted to keep the first wash clean, so I avoided working in an area for too long. If the wash is dry before you finish the wash, you can get some bad edges.
Second Wash - modeling the features
I waited for the first wash to be completely dry. After I made sure it is dry, I started to paint the facial features. I use a smaller brush and slow down quite a bit more. I pay attention to the intensity of my mixture and the color. Working on one section at a time. The goal is to do as much finish work as I can in this wash. Too many layers will make the painting dirty and not as fresh. To keep the painting fresh, clean and translucent, try to get the value and edge you want in this wash.
Finishing the Second Wash and start painting hair
I continued the wash down to her neck. You might also notice that I intentionally left some hard edges. I often see people try to use soft edge everywhere when painting portrait. While you might not see a hard edge on the face, it is important to use some hard edges to describe the structure of the face. If there's only soft edge, the painting will look too mushy.
After I finish the face I start working on the hair. When painting hair, I like to start bold and drop some strong Cobalt Blue on the paper. This will help me to loosen up with colors and establish the darker value that it needs.
The hair and the background
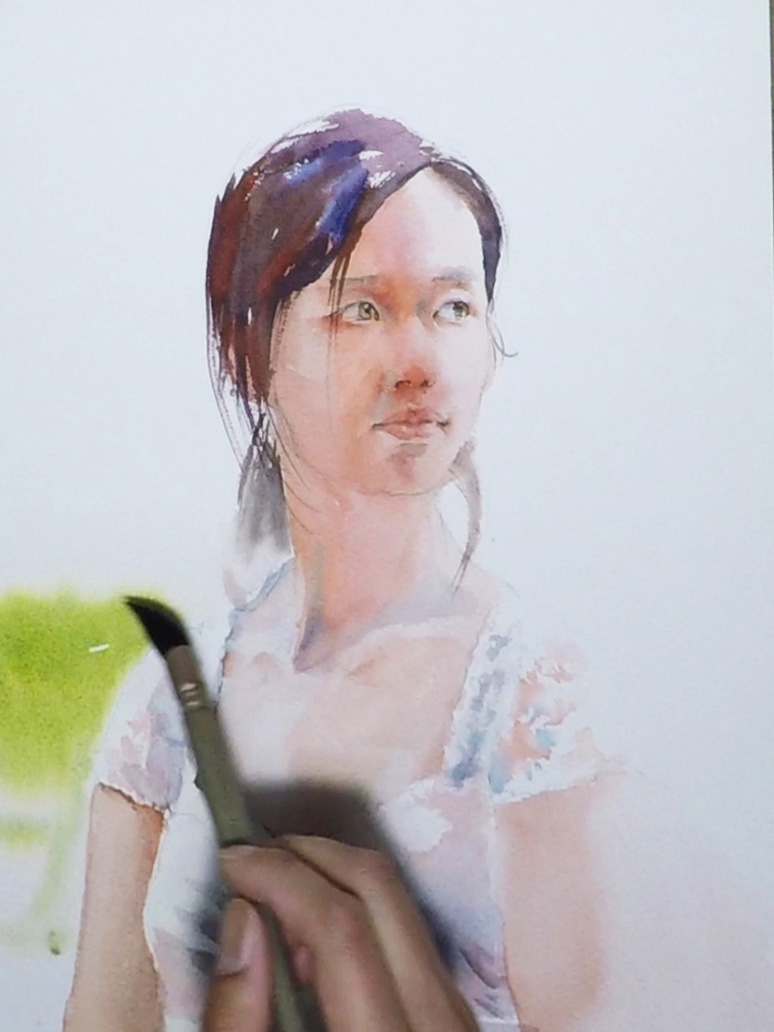
Now the hair is painted and WOW! what a difference it made! The darker value of the hair now makes the skin appears much lighter and brighter. You can now see the light! It's important not to over invest in the detail of the hair. Treat the hair as a big shape. All you need is some quick delicate strokes to suggest hair strand. The purpose of the hair is to bring out the light on her face, not to distract viewer. You might notice I reduce the hair strand that's covering her right eye in the photo. I don't want to make the hair too heavy. I also lighten and soften the hair that's behind her neck, so they will be pushed back and not competing with the face.
After finish the the hair and the final touches on the face and the cloth, I started to work on the background. I like the out of focus background in the photo, so I try to mimic the effect by painting some very soft shape. What I did is to pre-wet the left side of the painting with clean water(carefully paint around the figure). And then I drop in some saturated mixture of green in the wet area. The paint will spread out slowly and creates wonderful soft shapes. I want to keep the right side a bit lighter so I just did just enough to show the shape of her shoulder.
Finish!
Here's the time lapse video of the entire painting
Portrait painting is a great passion of mine. I hope you like this painting as much as I enjoyed painting it =)