When I was just getting started on watercolor, I was ready to be fully committed. So I spent a long time in the art store and pick out what I thought would be useful. I spent a bunch of money to get a bunch of materials. After a few months, I found out that I don’t need at least half of those materials. Now after a couple of years of painting watercolor, I think I’m ready to make some recommendations for the beginners.
Material is important. At the beginning of this year, I made a video on my materials and set up during that time. Even though I have some new materials now, the majority of the materials are the ones I’ve been using for years. And that’s what I’m going to share with you today. This video is not a comparison video, I’m just sharing my experience with you. And what’s important is that even though my recommendations are for beginners, they are good materials that I still use today as a professional artist. So it’s not some cheap stuff that you’ll throw away as your skill progresses. So let’s cut to the chase and talk about them.
Paper
So let’s start with paper. Good papers make painting easy. Especially when you want to do a lot of wet on wet technique. The problem is that high-quality papers are mostly more expensive. And when you are just starting, getting expensive paper can add to your stress. Because you will likely produce unsuccessful paintings. Out of all the materials, papers are used up at the fastest rate. So I want to recommend to you some affordable, good quality paper, that you will feel less painful if you mess it up. I also recommend smaller papers. It is more tricky to do a larger painting when you are just starting off. Smaller painting is easier for you to manage the overall picture and will force you not to focus on details too much. Here are some of the papers I like:
MozArt - This is a relatively new brand. The founders are a couple in UK. This is a very affordable option for you to just playing around and do some small sketches. The paper is quite thin so if you use a lot of water it will buckle. To avoid it being buckled too much, my suggestion is not to paint too close to the edges of the paper. Because what happens is the fiber of the paper expands when there’s water. So if you leave some room on the edges, the buckle will be a bit less crazy. That being said, there are ways to combat that, and also ways to flatten your painting afterward. I can make a separate video on this if you want, let me know down below. Anyways, while this is not a high-end paper, it takes the water and paints pretty well and the color turns out nicely. I did a few small paintings with it and I’m quite happy with the result. The only size it carries is the letter size which is 8.5 by 11. That is a good size for the beginner. And they only have the cold-press option which is what I use anyway. So if you are looking for a small, cheap paper, this is a good option.

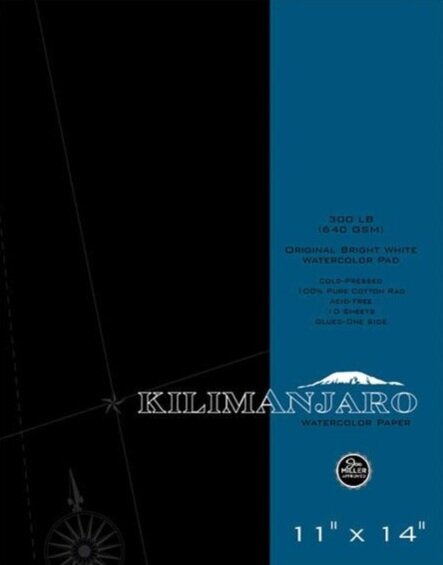
Kilimanjaro - This is another good option. This is exclusive from cheapjoes.com. It is 100% cotton and it takes water and paints very well. It is in blocks so it buckles less. I do a lot of value studies with it. But I also did some color sketches with them with good results.
BaoHong Academy grade - BaoHong is a Chinese brand watercolor paper. This is a 100% cotton paper. The quality is great, I have done many paintings on it including some commission works. I can say the quality is just as good as some named brands such as Arches and Saunders. The only caveat is that this paper is not carried in most of the art stores online. If ou live in US, the only place to get is from AliExpress, I put the link down below so you can check them out. While it is more expensive than MozArt, it is cheaper than a more expensive brand. But the quality is just as good for me. If you do decide to get this, I suggest you get cold press, the size is up to you since the largest they have is 15 by 10 which is a good size. Since they are mostly shipped from China, it might take a while to get there, so do keep that in mind.

Brushes
We are in a wonderful time that the manufactures came up with high quality and affordable synthetic brushes. I mentioned many times that I am phasing out my animal-hair brush and going to use only synthetic brushes. They are a lot cheaper and just as good in most cases. And if you choose to go with any of the paper I mentioned earlier, you only need 2-3 of them.

Escoda Ultimo - This is a great synthetic squirrel hair brush, this is great for making big washes because it holds a lot of waters. It also holds a nice point so you can have quite a bit of control with the shape you want to make. I recommend size 14 because it is big enough for you to make a bigger wash on a smaller paper, but not too big. So that you won’t get your painting too wet too easily.

Escoda Versatil - This is a synthetic kolinsky hair brush. I use this mostly for more abstract shapes such as trees, foliage, and such. It holds a good amount of water and it is easy to use. I recommend size 14. You can paint bigger shapes with this brush, but it can also allow you to paint some fine details with it.

Escoda Perla - This brush is great for harder shapes such as buildings, cars, and other manmade structures. The hair on this brush is a bit more snappy and rigid. But it has a very sharp point at the front which is great for painting detail. I recommend size 12 because it allows you to paint some medium size shapes. Yet the tip of this brush will enable you to paint some finest details.
Notice that I didn’t recommend any small brush. And the reason for that is because you want to train yourself with a slightly bigger brush and make different marks with it. You can paint a good painting just with these 3 brushes. If you have too many brushes, it can actually slow you down because you start to debating what size you should use. Get used to a limited brush set, then expand your brush selections as you progress.
Paints
When you just starting, you only need 4 colors. When you are just getting started, you don’t want a 24-color set. Instead of getting a cheap 24-color set, get 4 high-quality tubes of paint. The colors I recommend are Cobalt Blue, Yellow Ocher, Burnt Sienna, and Neutral Tint. They are the muted primary that makes color mixing easy. I made a separate video on that already. So, if you haven’t watched that one, be sure to check that one out. It is a very important video, I’ll put the link down below. With just these 4 colors, you make color mixing simple for you. You will feel limited, but that’s a good thing. Because it’ll be like playing a game with very simple rules, you can just learn rules very quickly and start having fun. It will also be affordable because you are only getting a few colors. And since they are high-quality paints, you will be able to continue using them. When you are more experienced in color mixing, you can add colors on top of them.
Some other affordable supplies are:
Palette - You can use any palette you are comfortable with, as long as they have good mixing areas. I got a 13 wells aluminum palette. It’s cheap and quite good.
Light - Lighting is important, you want a nice bright light to lit up your painting evenly. And very importantly, you want a light that’s 6000 kelvin because it gives you this nice white daylight. If you paint with typical warm tungsten light, you will not be able to judge your color accurately. The light I’m using right now is Phive LED desk lamp. It’s my favorite light so far. You can get it from amazon, the white one is slightly cheaper than the black. It is a bit more expensive. So if you are not ready to invest in that, you can just go to a local home depot, get a cheap clamp light socket and a 6000k LED light bulb. That should be very cheap. Especially if you are using the size of papers that I recommended earlier, this should be enough for now.
All of the materials I mentioned are the materials I still use today. So you won’t have to replace any of them. Once you feel like you reach the limitation of these materials, you can start to expand your colors, brushes, and get bigger and better papers. Again, all of the materials I mentioned are listed down below, check them out if you want to. That’s it for today’s video, I hope you enjoy this. If you find it helpful, please give it a like and subscribe to my channel, you can also go to my website, sign up and download my fast track watercolor PDF guide. I am Eric from Cafe Watercolor, see you next time.