

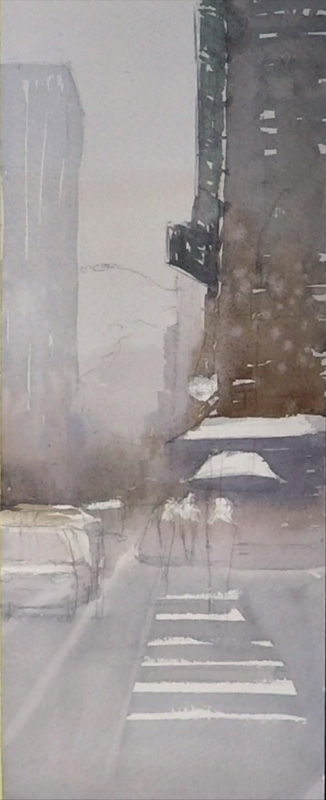
The past Saturday I had the pleasure to do a 90 minutes demo at Daniel Smith Bellevue. It was a quick attempt trying to capture a rainy street scenery. I thought it would be fun to do a recap on that. This painting is not as finish and polished as my other paintings, but the process is the same.
Drawing
it's a very simple scene so I try not to over complicate it. However it is a street scene, so the perspective need to be relatively accurate. Doesn't have to be a "mechanical drawing" accuracy. But it has to make sense. As I mentioned multiple times. Drawing is for you to analyze the form and shape physically. It is to figure out size and placement. Even after your drawing is done, you can still change it after you start painting.
First Wash
The goal of the first wash is a smooth gradiation. From top to bottom, from light to dark, and from cool to warm. I tilted my paper at around 40 degree so the paint flowed down slowly which helps to make a smooth wash. I left some random white spot here and there to give it some breathing room. As I reached the horizon I started to be a bit more careful and skipped around the highlight areas.
I used clean water to soften the edge as the horizon to avoid a hard line. I then continue the wash down, from light to dark again. I did the directional line while the wash is quite wet by using a clean damp brush and glide over it.
Distance Building
After the first wash is dry, I started to paint the distance building. To push it back into the distance, I kept the building light. But I added more paint and made it darker as it came down. I also soften the edge and expanded the wash to the right so it connects to the building on the right. With the wash still wet, I added some soft detail to the background. Those soft details will enhance the depth.
Mid-ground building
The midground building on the right is one of the main shape in this painting, so it has to be much more defined and prominent. Once again I started from the top and work my way down to the bottom. I left some white to suggest windows. Again I kept the color cool on top and warm at the bottom. I left the canopy white because it is catching the sky light.
At this stage, the painting already started to have good sense of depth.
Cars, figures, and everything else

Time to do the car and the figures. Even though it will be the focus of the painting, they won't work well unless a good background was established. Which is something I want to focus on for this post. Quite a few people compliment on how I was able to create depth. I can only say that a good thought out background is necessary for it. I kept my car and figures very simple because of the time limit. If I have more time I might refine them further. The reflection is done by re-wet the areas where I want the reflections to be in, and then dropped in some dark paint and let it flow down.
Timelapse video
And for your viewing pleasure, here's the time lapse video of the painting =)